Showing posts with label repurposed. Show all posts

Thursday, December 13, 2012

Zoey's Uber-Chic Loft..... showing off some new pieces...

Zoey;s Uber-Chic Loft booth space.....as of 2 weeks ago..... made some more pieces to bring to the shop.... here are just a few items on the way over....
Chalkboards from vintage frames.....repainted, distressed ...love them!

A gorgeous vintage trunk that I restyled..... a french advertisement added to the front...this piece I just finished and taking to the shop this weekend.....I tried new techniques on painting this piece.....no stencils used here....


A really neat foot stool or storage seating made from a vintage galvanized drum/can and a vintage Canners Salt Mineral grainsack bag..very industrial chic !
 
I also make messenger style bags/purses/laptop bags, etc.....from antique & vintage textiles..mostly WWII military canvas items....


Canvas Messenger Bags I made from antique & vintage military duffel bags and mail bags...various vintage straps hand dyed too...... LOVE THESE  .....  big enough for a laptop....I lined them and stenciled the fabric inside.

Monday, October 22, 2012

Getting pieces ready for the NEW ENGLAND SHOW this friday....


working at a slow but steady pace.....details about the show is on the sidebar on the right......getting more pieces made to bring to the New England Folk Art Show this Friday-Sat-Sunday......  hope to see some of you there :)))))))

Burning the midnight oil here in the studio.....

Thursday, October 18, 2012

More Zoey's UBER-Chic Loft pieces ........

 Thought I would share some samples of a few new (repurposed) pieces we have finished up and ready to bring to the new shop this weekend.  I'm in love with these new pieces too.  Seems everytime I make something new I just want to keep it ;)

Our newest piece (above) is what I am calling my repurposed French Industrial Foyer Message Center/Catch-all.  I wish I took a before picture of this very bland brown antique 3-mirror vanity.  I repainted in a wonderful old white and distressed it.  Painted the top surface old black and then we did chalkboard paint on the 2 side mirrors...and I had found an old black chair that I thought would match up really nice with this piece...and it does!  I distressed it the same as the vanity and kept the original black leather seat.  I LOVE this piece.....I think if my girls saw this they would want to trade it for the ones I already did for them ;)   
I repurposed a vintage lamp (rewired it too...yeah, I'm getting pretty good at that...hubby is an electrician and taught me what to do....he still rewires the hard ones though..LOL) ---- did a makeover on an old shade and now a great  French Industrial Light....

Here again, I did another one.....looks fab on the vanity piece..... oh and I'm doing pillows too.....

WOW....I LOVE this piece.....we found an old vintage trumpet that was kinda beat up but surprisingly still worked.  But not enough for somebody to still play.....soooooooo I had a grand idea of having hubby turn this into a light......  what a fab job he did......a really cool one-of-a-kind light.....


Here is a pictures of pieces stacking up in my studio waiting to go to the shop.....

Another makeover project...... it was a really nice barrel style solid PINK vintage hamper made of metal and wicker weaving  ..... I did a little of my distressing and repurposed it into a French Inspired Storage Seat or it could still be used as a hamper too ;) ....daughter saw this and really wanted it too....

Tried my hand at a little upholstery project..... wish I would have took a before of this bad boy..... it was a very ugly red/blue/brown check patterned ottoman on wheels with ruffled fabric at the bottom so you could not see the legs.  I knew I could do something with it.....so I took one of my vintage mineral fabric bags with really cool printed typography graphics and some original mending sections in it and created a cover. Then to make it look industrial I had to paint the wood part and then added handdyed vintage rivet type trim around the bottom edge.....WOW you really gotta see this it turned out fab.....


Another really cool piece.... I was told it was an antique smoking table.  I moved the things that were attached at the top so now you can put your coins in it (probably can't see that round wood thing screwed to the top) added a 1963 Vintage Texas licenses plate to the front and kept the original black & tan chipped paint patina....very cool piece to put next to the door and drop your mail, keys & coins when you get in...or a really neat accent table............

Another accent side table with a metal base.  This started as a plain black trunk, I added the vintage leather horse reins for straps and then found a metal base from another ugly table and put it on this.....a great place to put magazines & newpapers.......

And last but not least.... this started as a leather suitcase with lots of character.....hubby put these found vintage mid-century danish legs on it to create a really unique one-of-a-kind coffee table for end table.....
 
Thanks for looking at some more of my work.......these are all for sale and will be in my shop located INSIDE a co-op antique shop called Liberty Hollow located at 4975 W. Ridge Rd (rt 104), Spencerport, NY  .... which is in ROCHESTER NEW YORK.

Friday, October 5, 2012

NEWS UPDATE - We opened a NEW SHOP

Well I have been crazy busy..... expanding & growing the business.
As you know I posted earlier that not only do I make soft sculpture art pieces me & my husband also do repurposing and dabble in all things antiques & vintage.
I have been wanting a place to setup shop and sell my items and we finally did it! 
 
 It took months of researching but we finally got a space in an antique mall co-op shop and got it all set up the other day....which is about an 1 1/2 hour drive from me...unfortunately there was absolutely nothing here in my local city that was comparable....too much "flea" if you know what I mean ;)
 
Anyway, I will eventually introduce my bears, dawgs & other soft sculpture there as well but wanted to get my other pieces out of my studio....all of this has been sitting in my studio and was to the point of not being able to move anymore.........gosh I finally have some space again!
 
The first thing I told my husband was that we need to make a HARWOOD FLOOR for my space.  I was not liking the ugly carpet and it was just so drab looking...I was going for the unique looking "industrial chic style" (modern) looking space.  So he made me a 'floor" from 2 pieces of heavyduty plywood and we stained it ebony....Love how it turned out and it was low cost for the "pop" factor I was looking for. 
 
And I am calling my new business space.....
ZOEY's UBER-CHIC LOFT
 
LOL....yup, inspired from my little boston Zoey....
 
Soooooooo if you are in the Rochester New York area.... please stop in and check out my space.....  here is a little ad I put together ....
 
*******
 
A NEW Uber-Chic shop has now opened - come and check it out.

Artist repurposed Antiques & Lighting for you & your home in super cool  Industrial Urban Chic, French Chic & Cottage/Shabby primitive Styles!  And all prices are affordable too !!!!!

 If you like the unusual unique ONE-OF-A-KIND then you will really like the items in this new shop.  Check it out often as new pieces arrive weekly.

Repurposed pieces such as benches made from a antique beds & reclaimed 1800's barn board for the seats, messenger bags/purses from Vintage Military duffel bags & foreign war bags all fully lined, various feather down pillows,   steampunk urban unique repurposed lighting, repurposed antique trunks & luggage for storage accent tables and coffee tables...etc......and of course lots of antiques & vintage items mixed in too!

 A space Located INSIDE  Liberty Hollow, 4975 Ridge Road W. (Rt 104), Spencerport NY 14559  -----  over 15,000 sq. ft. of Antiques, Collectibles, Gifts and HANDMADE!

Open 7 days a week 10am - 5pm ..... Thursdays open even later 10am-7pm......so you can shop right after work...
*******

Wednesday, August 29, 2012

More Show Previews......


French Inspired Antique repurposed goodies will be at the show......  I made an assortment of necklaces from antique china head dolls and various vintage parts.....

Love this antique chippy gesso oval frame..... I added aged french inspired textile to hide the old wood backing.... perfect piece to display a vintage treasure on .... this piece and various others will also be at the show.....
and whatever pieces still remain after the show....I will hopefully offer them for sale online providing the shipping is reasonable ...... but these one-of-a-kind pieces are just WONDERFUL if you can see & touch them in person ;)

Tuesday, August 28, 2012

Show Previews.....

 I know that you probably think that all I make is soft sculpture collectible art pieces such as teddy bears, dogs, ellyfonts, etc........  but not so..... 


My husband and I (and our little helper Zoey!) also dabble in repurposing old antique or vintage forgotten items into fresh new things for your home, office and studio spaces..... such as these antique & vintage wood beds into beautiful benches,  often times using reclaimed barn boards for the seats!  These are simply stunning and he makes them extremely sturdy....not some rickety job that will fall apart if you actually use them ;)
 I loved the old chippy white paint on this twin size bed when we found it ..... I told hubby he had to leave it just the way it was and incorporate his work keeping this awesome patina for the bench.....I absolutely love it !!!......  This is just one of the pieces that will be for sale at the Folk Art Festival show in October ......and Ladies....just so you know.... this size bench would fit right into a minivan or SUV to take it home...also might just fit into the backseat of your car too.....LOL! 
This one is gorgeous....and is a double size...reclaimed barn board for the seat...just stunning.  I can see an antique quilt or coverlet draped over the back with perhaps a pillow to invite you to sit.  Perfect for a hallway or entryway to put shoes on etc.....even on a covered porch like I have pictured here. So many possibilities....will be at the show too....


 And this cutie patootie has a more "clean finish" for that person who prefers the less worn & primitive look..... or perhaps you may like to "distress" this piece to your liking.....I love the antique bed finials and design on this piece!  It's the same design as the chippy white one...but this bed did not have a favorable finish to keep....she needed paint.
 
Well, I just wanted to introduce to you some more items that will be available at the show other than my "normal" work.  We are hoping to bring a big variety of vintage, antique, handmade and repurposed items.... and as time permits, I will try to post preview items that will be available at the show.
 
So I hope to see you there.....the information about the show is located on the top right side of my blog ..... don't forget to go to the webite and print out the coupon to get an admission discount.

Tuesday, August 14, 2012

Antique Vanity fit for a shabby-chic Princess....

who is heading off to college in a few days.  
Mind you, this is the second antique vanity that I have given new life to.  The first antique vanity I never took before or after photos and it now belongs to one of my daughters(who will also take hers to college).....and now this antique vanity.  I remembered to do before and after photos so I could share.  This one now belongs to my other daughter....and she is taking it with her to college as well. (They both live off campus now..otherwise these would never have fit in a dorm room)  

my little helper

I actually picked up both antique vanities pretty cheap while scouring craigslist for weeks until I finally found 2!  You see both of my daughters are only about a year apart and it has been pretty much like having twins for the last 19 years...gotta get 2 of everything! 

They both really wanted shabby chic old feminine vanity sets.....not the new modern ones but the old antique kind like these.  (They are actually getting into the love of antiques & old stuff like me......LOL!!) 


 They both wanted them painted white with a little bit of distressing...not alot....they still are not quite into the really old chippy looking things YET.....hahahaha !

So I made my own chalk paint in an off creamy white and did just a tiny bit of distressing on this piece...and the best part is that she totally loves it!  I'm happy , they are happy and they both now have beautiful antique pieces of furniture to keep and pass down to their kids someday ;)

So if you have a little shabby-chic princess....you may want to find an antique vanity that nobody wants (try your local craigslistings)  and give it a little paint.....I bet your daughter would adore having one of these oldies....they just don't make them like these anymore! 

Monday, April 16, 2012

Kitchen Food Pantry Project.....

The new Kitchen Food Pantry Project....... above is the completed .....Below is the Before kitchen facelift....we moved the frig from inside the wall to across the room and we used the "hole" to build the food pantry.

BEFORE Kitchen Facelift

 First we had to build the inside with a shelves to hold the pantry shelving units.....


We used the old antique cabinet doors from an antique cabinet (that we repurposed) ..... I purchased these really big heavy antique barn door hinges rather than buy brand new, which were necessary because the shelving units that hang on the door hold can goods....... see here is the inside of the door units where cans and such are stored.....
The bottom section I was going to put matching baskets...but decided to use what I already had .... a couple of really old crates.... I put those grocery plastic bags in one crate and the other less used big items like the big jugs of olive oil in another......

For the door handles I decided to use these antique door knobs with the original face plates!  They already had this wonderful old chippy cream paint left on them so we just screwed them to the front of the door cabinets....... what a great conversation piece....and it functions PERFECTLY.  I'm glad we used door knobs because the doors are really heavy and they needed something bigger with more substance in order  to grab when opening..... your average cabinet knobs from the store would not suffice......  plus it gives the kitchen way more one-of-a-kind character too :))))


Here is what the inside looks like...... it is one of those pantries that swings open with shelves in the back too......  we bought the "GUTS" which is (4) pieces,  online from Kitchen Source http://www.kitchensource.com/pantry/rv-4wbsp18-25.htm
The only thing is it took well over a month for them to deliver......but the product is great and of good quality....not flimsy.....and I shopped around for the exact same cabinets this was the cheapest place and I got free shipping......perfect for the DIY and you save big $$$ by installing your own cabinet organizers.....

AFTER
I have another "repurposed" project that is on my list for my husband.......not sure when he will tackle it but I will be sure to share the project posts with you...... 

I hope I inspired some of you to stop procrastinating on those projects and just get started ....... go for it!!!  Feel free to share your repurposed projects on my Whendi's Bears Facebook page :) 

Wednesday, April 11, 2012

Kitchen Facelift - Part 2

(BEFORE) large antique wood cabinet - we took the big 50" doors off to use for our other kitchen project built-in food pantry......


Finally, my kitchen facelift is 99% complete .... Hooray!
Thought I would share one of the last projects we worked on.  I wanted a "country kitchen" open shelf type cabinet with a plate rack to put on the wall where there are no existing cabinets and was an odd part of the kitchen where the ceilings were not the same height and was close to the entryway of the house and beginning of the kitchen.

So we took an antique wood cabinet I had been using as my "food pantry" for years but now have no use for it because we made a built in food pantry (show that project in next blog post) ..... sooooooo, I talked my husband into recycling the cabinet and making it into my open country cabinet plate rack.    I LOVE to repurpose old items ....
My husband agreed and gave it a go..... I tried to remind my husband to take pictures of his progress so we could share it.....   So here are some of those pictures of the cabinet repurposed..... 

He cut down the cabinet to just 2 shelving units.... this is approx 3 feet tall now....that was as big as I could put on the wall........  He took out the middle wood piece and put it on the bottom shelf.  Had to purchase some new wood for the middle shelf piece.

Then he added a new wood backing but ended up putting bead board on the inside back (not shown).  Like I said he wasn't really good about taking pictures of his progress ;)
Added the dowels to the bottom shelf section for the plates...holds 18 plates.
Painted the inside the vanilla bean cream color that matches the island...and the exterior my old red color.


And here is the finished piece..... I really love the look it adds to the kitchen.  I will have to take a picture of the whole kitchen to show you the overall project.

Friday, March 16, 2012

My Kitchen Facelift

I can't tell you how long I have been wanting to remodel my kitchen.  It is the only room in the house that has not been remodeled with up to date cabinetry, etc.  My cabinets & countertops are 23 years old.  We went out looking at new cabinetry....but after a getting STICKER SHOCK on the prices of what all this new stuff would cost.....I decided to do a little (what I am calling) a KITCHEN FACELIFT on a budget (UNDER $500).....to get a fresh new looking kitchen and hopefully many more years of use before a real kitchen remodel.......

This is what the kitchen looked like before.....which I liked but it was tired and I was tired of it too ....and our frig was in another spot located across from the cabinets in the wall as shown here in the before......  
BEFORE
now the after....
AFTER

Newly Painted Cabinets and frig location


We turned the kitchen island around and centered it in the middle  -  $0 - it opened the kitchen right up so now you can walk or sit/stand all the way around....
We cut it down a little because it was too long (still need to trim that end) - $0
We added wainscot, tim and a new bottom cabinet to the island - $55
painted the island a vanilla bean color - $20  gallon paint lots o leftovers there
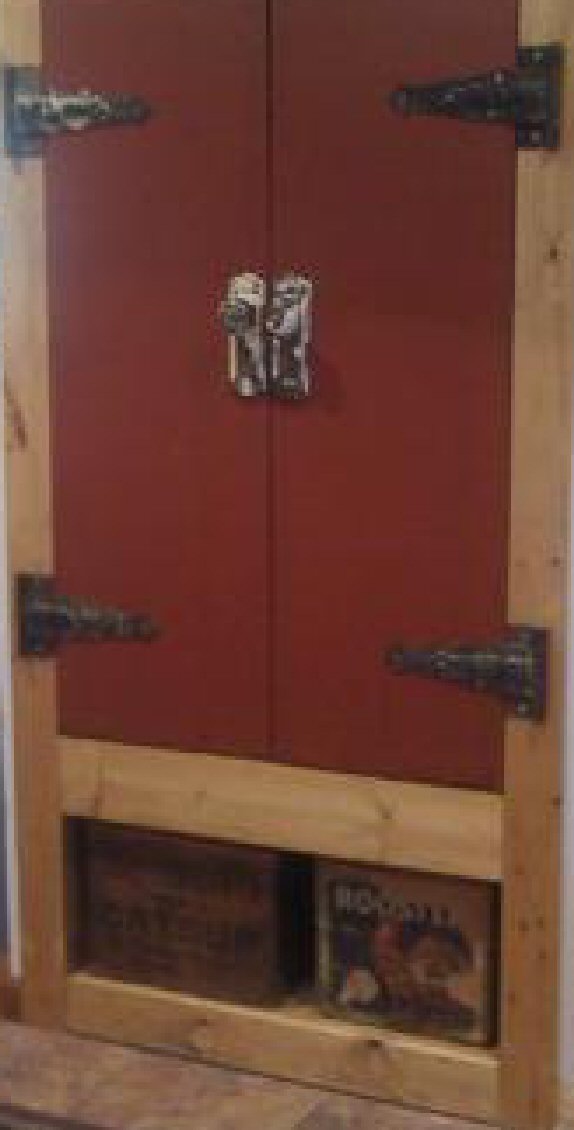
Painted all the existing cabinets an old red color - $35 gallon paint
Painted my one green wall to the red color and painted my entry way green walls the red (not shown but will take pics) - $0 used the red paint from cabinets
Moved  the refrigerator to the other side of the kitchen - $0  (husband is an electrician so no $$ for wiring)  WISH THE FRIG WAS BLACK...
Bought new cabinet for over the frig 20% off unfinished - $45
painted existing stools (still have 2 more to paint) $0
Turned the light fixture above the island around - $0
Hung this WONDERFUL french country antique door/shutter distressed piece on the wall  LOVE IT! - $0  (had it in my basement family room)
Purchased this WONDERFUL distressed big wide farm bench to sit under it - $66 (yes I can't believe it! I got it at an antique shop during a sale....these run $250..and it is definately authentic! )
Oh...and a HUGE change was we spray painted the overhead stove fan/exhaust black - $8 ( was one of the best things and least expensive)

hmm.what else...... for the empty "hole" where the frig used to be, we are installing one of those pantry cabinet organizers and hopefully using cabinet doors from an antique cabinet I have......  When that project is done I will post the pics.....

So overall I love the kitchen .... especially for the little money we spent....just alot of time and patience ;)   

Thought I would share my kitchen facelift.......just in case anybody is thinking about a kitchen remodel but doesn't want to go out and buy all new stuff...... think about painting and re-using alot of things you already have around the house plus just a couple of unfinished "off the rack" wood cabinets at Lowes ...it really does make a difference :)